Adding Facebook Messenger to your store
From Spiffy Stores Knowledge Base
Learn how to Add Facebook Customer Chat to Your Website.
Want a better way to connect with prospects and customers?
Did you know that Facebook Messenger makes it easy to embed a live customer chat widget on your site?
The Messenger Customer Chat plugin allows you to have a live conversation with site visitors.
In this article, you’ll learn how to add a Facebook Messenger customer chat widget to your site.
Contents
Why Use Messenger’s Customer Chat on Your Website?
A customer live chat is a small floating icon that usually appears in the bottom-right corner of a website. Like traditional live chat software, you can install a Messenger customer chat plugin on your website.
This plugin makes it easy for any website visitors with a Messenger account to have a live conversation with a human, leave a message, and interact with your Messenger bot.
Facebook doesn’t charge you anything to install this customer chat widget. You don’t even need to have a Messenger bot. The only requirement is a Facebook page.
Before we talk about how to set up a Messenger live chat feature with the help of ManyChat and Chatfuel, let’s look at a few reasons why you should have a live chat on your site.
Manage Conversations Via Your Page’s Inbox
Any messages sent through the Messenger chat widget on your website will automatically appear in your Facebook page Inbox.
You can also read and reply to visitors’ messages on your mobile device through the free Facebook Page Manager app, which is available on the Apple App Store and Google Play.
Enhance Customer Service
According to Facebook, 53% of people are more likely to shop with a business they can message directly. With your traditional live chat, you can only carry out the chat conversation on a specific site. With Messenger chat, though, you can start a conversation on desktop and then continue it on your mobile device with Messenger at a later date or time.
Provide Instant Automated Answers
The Messenger Chat widget allows visitors to ask questions directly on your website and you can carry on conversations with potential leads in real time.
Step By Step
There are two parts to adding the widget. You first need to get the code from Facebook.
- Log into Facebook, and go to your business Facebook page
- Click on Settings in the top right
- Click on Messaging in the menu on the left
- Scroll down to the Add Messenger to your website section, and click the Get Started button
- Go though the setup steps until you get to the ADD WEBSITE DOMAIN NAME section
- Add your store's domain name, and click the Save button
- Copy the code in the Code Snippet section
Once you have set it up in Facebook, log in to your store's admin, and follow the steps below
- Go to the Design & Assets -> Theme Editor section
- In the theme editor, check you see if the Theme Settings has an "Advanced" section.
- If it does, then paste your code into the "Add code to the <body> section of your store"
- If it doesn't, scroll down to the Store Layout section, and click on the Theme.liquid file
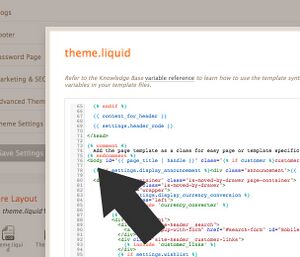
- The theme.liquid file should now display. Scroll down to where you can find the <body> tag in the file, as shown in the image to the right
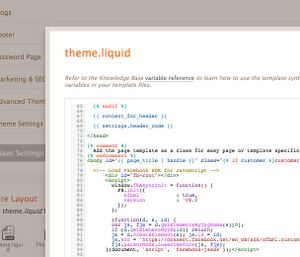
- Paste your code on the line below this tag, and click save.
- The theme.liquid file should now display. Scroll down to where you can find the <body> tag in the file, as shown in the image to the right


